
Cleaning a cooler comes down to four steps
Only three parts of a cooler get dirty inside: the tank the water drains into from the bottle, the tubes and taps, and on the outside the drip tray and the seat under the bottle neck. Everything else, from the casing to the compressor, never touches the water and only needs a cloth to dust it. So the whole job comes down to four steps and takes about an hour, of which you are busy for maybe fifteen minutes.
The four steps in order
In short, here is how to clean a water cooler: take off the bottle and drain what is left, wash the removable parts in warm water with baking soda, fill the tank with a citric acid solution or a ready-made cooler cleaner and let it stand, then drain it through both taps and rinse the tank twice with clean water. A fifth step is optional but sensible: wipe the bottle seat and the drip tray while the cooler is taken apart anyway.
The order matters, and it is best not to change it. Outside first, then inside — otherwise dust from the lid and the seat ends up in a tank you have just washed. Washing first, then disinfecting: these are two different jobs, not one. The sponge removes the film, the solution kills what lived under it, and on a layer that has not been washed off any product works at half strength, because it simply cannot reach the surface. And rinsing always comes last: leftover acid can be tasted in the water for several days.
| Product | How much | How long | How to finish |
|---|---|---|---|
| Citric acid | two or three teaspoons per two litres of warm water | twenty to thirty minutes in the tank | two rinse cycles with clean water through both taps, a third if you can still taste acid |
| Ready-made cooler cleaner | as stated on the pack | exactly as long as stated, and no longer | the same two rinse cycles as after citric acid |
| Baking soda | on a damp sponge | no contact time: it is for washing the drip tray and removable parts | rinse the parts with clean water and let them dry |
| Hydrogen peroxide from the pharmacy | on a clean cloth | no contact time: it is for wiping the seat, the spike and the spouts | wipe the same spots with a cloth dampened with drinking water |
Different models, one procedure
The procedure is the same for every household model. A floor-standing unit has a taller, larger tank, a desktop one a smaller tank, and in a bottom-loading cooler a pump lifts the water up a hose — but what gets washed is always the same: the container where the water stands, the path from it to the tap and everything that touches the bottle neck. Only the access differs: in some models the tank is open at the top and easy to see into, in others it sits behind a narrow opening and the solution goes in through a funnel.
Nothing complicated has to be taken apart. The back panel, the compressor, the control board and the radiator have nothing to do with the water, and there is no reason to remove them at home: there is no film or deposit there, but there are live parts. What comes off by hand without tools is the drip tray with its grille, the cover of the bottle seat and, on some models, the taps — and that is enough for cleaning at home.
When to do it
The one thing worth planning ahead is timing. The hot tank takes about an hour to cool, and it must not be drained before then; the solution then stands in the tank for another half hour; two rinses take about twenty minutes. Start in the evening and the cooler will only be back in use late at night, so it is easier to do it when a bottle is running out rather than in the middle of the working day.
The bottle brings up a second small point that people usually skip. It makes sense to start with the cooler empty: if a few litres are left in the bottle, you will either have to pour perfectly good water into a bucket or put the opened bottle back on an unwashed seat — and half the point of the procedure is lost.
The rest of the article covers the same ground in detail: where the film comes from, how to work out the interval between treatments, what to prepare in advance, how to go through the procedure step by step and which products must never be used on a cooler.
Where the dirt comes from: biofilm, mineral deposits and dust
It is easier to understand how to clean a cooler once you know what exactly you are washing off. There are three kinds of dirt, and they come from different places: a living film on the wet walls, mineral deposits from the water itself and ordinary dust on the outside. Each needs its own products and technique — which is why one cloth is never the end of it.
A living film on the walls
The first and main one is biofilm. Bacteria that land on a damp surface attach to it and release a slime they then live in. The film is almost transparent and slippery to the touch, and it does not appear because the water is bad: no drinking water is sterile, and room temperature plus constant moisture in the tank make a comfortable environment for microbes. While the layer is thin, the water tastes normal; once it thickens, a musty smell appears, along with a slight cloudiness in the first glass after the cooler has stood unused.
Mineral deposits
The second is mineral deposits. Calcium and magnesium salts settle on the walls, most readily where the water is heated: in the hot water tank and on the heating element. The deposit itself is harmless, but it is rough, and film takes hold faster on a rough surface than on a smooth one. Hence a simple rule: the harder the water, the shorter the interval between treatments.
Dust, hands and air
The third is dust and whatever hands bring in. The bottle stands neck down, and everything that has settled on its shoulders and cap ends up right above the water when it is put in place. Fingerprints go the same way if you hold the bottle by the neck. The drip tray under the taps is a story of its own: there is always a little water in it, it is warm and dark, and slime appears there sooner than anywhere else.
There is also a fourth source that people rarely think of — air. As water leaves the bottle, room air comes in to take its place through a valve or a gap at the neck, carrying dust and spores with it. No cooler is completely sealed, so the question is not whether a film will appear, but how often to remove it.
Why you cannot see the dirt
Noticing all this in time is hard, and that is the main peculiarity of a cooler as an appliance. The tank is closed with a lid, you cannot see its walls, and the water in the glass looks the same whether the cooler is clean or has not been washed for a year. People usually find the film with a finger: they take off the drip tray or wipe the tap spout and feel something slippery. By then it has been in the tank for a long time.
Smell is a late sign. It comes when the layer is thick enough for bits of it to flake off into the water; until then nothing changes in look or taste. That is why treatment is scheduled by the calendar rather than by how things seem: a fixed interval is the only way you have at home to avoid missing the moment.
All of this happens at different speeds, which explains why coolers in identical offices get dirty at different rates. Film grows faster the warmer the water and the longer it stands still. A cooler by a sunny window and a cooler in a corridor that people use once a day will get dirty sooner than one standing in a cool room and getting through a bottle in three days.
How often a cooler needs sanitising
The honest answer to how often you need to clean a cooler uses two counters at once: the calendar and the number of bottles changed. The calendar matters because film keeps growing when the cooler is idle, sometimes even faster: standing water goes nowhere and does not wash anything away. The number of bottles matters because every change means an open neck and a portion of dusty room air.
Intervals for home and office
The working rule is: a full sanitising every three to six months or roughly once every twenty bottles, whichever comes first. At home, where a bottle lasts two weeks, that works out at twice a year. In an office, where a bottle goes in a couple of days, it is once a quarter or more often.
| Where the cooler stands | Water use | Interval |
|---|---|---|
| Home, two or three people | a bottle in 10–14 days | every 5–6 months |
| Small office, up to 10 people | a bottle in 3–4 days | every 3 months |
| Office of 10 or more, reception, workshop | a bottle in 1–2 days | every 1–2 months |
| A cooler after a long idle period | uses no water at all | before it is switched on again |
Idle time deserves a line of its own. A cooler that was switched off for a month and left with water in the tank looks worse inside when it is switched back on than an office cooler after a whole quarter of work. If you are going away for a long time, it is wiser to drain the tank and leave it open, and to treat it when you get back, before putting on a fresh bottle.
Unscheduled reasons
There are also unscheduled reasons that do not cancel the schedule but override it. There are four of them, and none needs any instruments to notice.
- Water from the tap smells musty or tastes of plastic even though the bottle is fresh
- The first glass after the night is cloudy or has small flakes in it
- A slippery film has appeared on or under the tap spout
- The cooler has been moved, dropped or stood without water for several weeks
Outside care and the seasons
Care of the outside is not part of this schedule at all. The drip tray, the tap spouts and the seat under the bottle neck are wiped at every bottle change, which takes two minutes. It is the outside parts that most often spoil the taste of the water, even though people usually blame the tank.
Summer and winter are counted differently. In the heat the water in the room stays warm, consumption goes up and bottles are changed more often — both counters run faster than usual, and it makes sense to make the summer interval a month shorter than the winter one. During the heating season something else is at work: dry air stirs up dust, and the outside parts get noticeably dirtier than the tank.
The filter and a note of the date
A built-in filter does not cancel the schedule. It holds back what comes in with the water, but it does not stop film from growing on the walls after it, and over time the cartridge itself becomes one more place where microorganisms live. Coolers with a filter are treated at the same intervals, and the cartridge is replaced according to the manual, however the water looks.
And one last thing: keep the count in writing. The date of the last treatment, written with a marker on a strip of tape on the back of the casing or in a shared office file, is more reliable than memory. Without a note like that, “I think we washed it in spring” quietly turns into a year and a half.
What you will need: products and tools
If you are working out how to clean a water dispenser for the first time, it is easier to get everything ready in advance: running off for a cloth halfway through, with the tank full of solution, is awkward. The kit is cheap, and you probably have almost all of it in the kitchen already.
Four products that work
Choose a product by its active ingredient, not by the picture on the pack. Four options work, and any one of them is enough.
- Citric acid — about a heaped teaspoon per litre of warm water; it dissolves mineral deposits and makes the environment acidic, so the film cannot hold on
- Baking soda — for washing the removable parts and the drip tray: a mild abrasive that does not scratch plastic
- Hydrogen peroxide from the pharmacy — for wiping the bottle seat, the bottle receiver and the tap spouts
- A ready-made cooler cleaner, as a tablet or concentrate — handy because the amount and contact time are printed on the pack
Read what the product is for on the pack, not just what is in it. Cleaners for kettles and coffee machines are made for limescale and often contain additives not meant for long contact with a large container; dishwasher products foam heavily, and the foam is then impossible to rinse out of the tank. Either use a product that says plainly it is for water coolers and dispensers, or plain food-grade acid.
Measuring without scales
It is easier to measure with a spoon than by eye. A heaped teaspoon is about five grams of citric acid, a tablespoon about fifteen; two litres of warm water take two or three teaspoons, so there is no need to remember grams.
There is no point in adding more in the hope of getting it clean faster. A strong acid solution works no better than a weak one, but it is harder to rinse out and can be tasted in the water for longer. It is simpler to wait the proper time than to pour away a fifth bucket of rinse water afterwards.
Tools and gloves
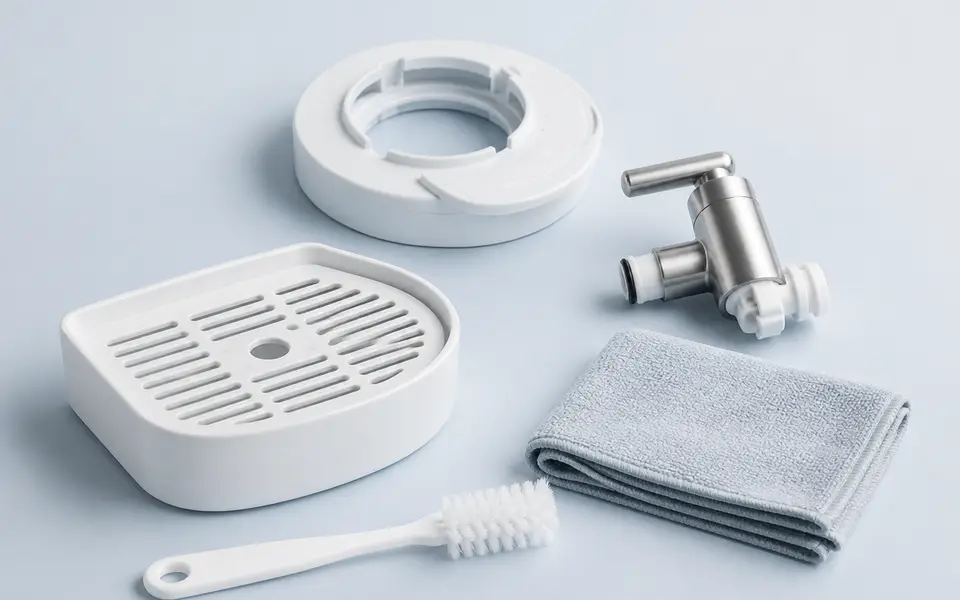
The tools are even simpler: a couple of microfibre cloths, a soft sponge, a small brush or an old toothbrush for the spouts and threads, a funnel, a bucket or basin of about five litres for draining, and gloves. Metal brushes, scrapers and the rough side of a sponge never belong on this list — we explain why in a separate section.
The gloves are not there to protect you from the acid but to protect the cooler from your hands. At household strength the acid does not harm skin, but your fingers touch the washed walls and lid, and whatever was on them stays inside. For the same reason, use clean dry cloths, not the one hanging by the sink.
Rinse water and draining
Rinse water deserves a line of its own. Two cycles take about four litres, and it should be the same drinking water that is in the bottle, not tap water: otherwise exactly what you have just washed off settles back on the clean walls. The easiest way is to pour the last litres of the outgoing bottle into a clean canister beforehand and keep them to hand.
The last step of preparation: decide in advance where the water will go. Two or three litres come out of the tank, a little more from the hot circuit, and all of it needs somewhere to go. If the cooler stands far from the sink, a bucket under the taps is more reliable than any bowl.
Sanitising step by step: outside and inside
Now for the procedure itself: how to clean a water dispenser from the drip tray to the tank, in order and without skipping anything. It takes about an hour, and most of that is the solution standing in the tank, when nothing is needed from you. The power is switched off at the very start and back on at the very end — this is not a formality: a heater without water fails within minutes.
Preparation and outside parts
- Turn off both switches, heating and cooling, and unplug the cooler. Let the hot tank cool down, which takes about an hour: draining boiling water into a basin is dangerous
- Take off the bottle and drain the remaining water through both taps into a bucket until they run with air
- Remove the drip tray and grille, wash them in warm water with baking soda, go over the corners and joints with a brush, rinse and leave to dry
- Wipe the seat under the bottle neck, the spike of the bottle receiver and the outside of the taps with a cloth dampened with peroxide or citric acid solution
- Remove dust from the rear grille with a vacuum cleaner or a dry brush: a clogged grille does not dirty the water, but it makes the compressor run hotter
The bottle receiver has different names on different models — spike holder, receiving funnel, valve — but the job is the same: remove slime and dust. On bottom-loading coolers, the hose with its intake tube needs the same attention: wipe it along its whole length, not just at the end.
The tank, tubes and taps
- Make the solution: two or three teaspoons of citric acid per two litres of warm water, or a ready-made cleaner as directed on the pack
- Pour the solution into the tank through a funnel so that it covers the walls, and cover the inlet with a clean lid or cloth to keep dust out
- Leave it for twenty to thirty minutes; with a ready-made cleaner, leave it exactly as long as stated on the pack, and no longer
- Ten minutes after filling, open both taps a little and run off a glass from each so the solution gets into the tubes and the taps themselves, then close them again
- When the time is up, drain all the solution through both taps into a bucket
- Pour in two litres of clean water, let it stand for five minutes and drain it through the taps — that is the first rinse
- Rinse a second time and drain the water completely: as long as you can taste acid in the glass, the rinsing is not finished
- Refit the drip tray and grille, put the bottle on, wait for the tank to fill and run off the first litre through both taps
- Only now plug the cooler back in and switch on heating and cooling
Two rinse cycles are the minimum, not overcaution. The cleaner stays not so much in the tank as in the tubes and taps, and only running water carries it out. If the water still tastes sour after the second cycle, do a third: two extra litres cost less than the spoiled taste of a whole bottle.
Not every model has removable taps. If yours comes off with a latch or a nut, remove it, soak it in the same solution for a quarter of an hour, go over the thread with a brush and rinse under running water. If it does not come apart, it is enough to run the solution through the tap and brush the spout on the outside.
A separate word about the hot circuit. That is where limescale settles, so when you drain the solution you must open the hot tap, not just the cold one. For the same reason it is not skipped during rinsing either: an aftertaste after cleaning most often stays in exactly the tube nothing was run through.
What not to do: chlorine, abrasives, boiling water
Half the questions about how to clean a water cooler are really about the opposite — what it must not be cleaned with. The list is short, but every item on it comes from someone's ruined cooler.
Chlorine and abrasives
Household chemicals containing chlorine are the first and main no. Bleach and bathroom cleaners do kill everything alive, but they are not made for dishes, let alone for a container people then drink from. Chlorine soaks into plastic and rubber seals, takes weeks to wash out, and after such treatment the water tastes of a swimming pool for a long time. It is unpleasant to drink, and sometimes unsafe.
Abrasives are the second no. Scouring powders, metal scrubbers and scrapers take off the deposit together with the top layer of plastic. After them the surface becomes matt and rough, and biofilm takes hold on a rough surface more readily than on a smooth one. Scrub it with powder once, and from then on you will have to wash the cooler more often than before.
Boiling water and mixing products
There is no need to pour boiling water into the tank either. The plastic and seals are designed for the temperature of the cooler's own heater, not for water straight off the stove: sudden heat warps the walls, and the seal loses its elasticity and starts to leak. Warm water that feels pleasant on your hand dissolves acid and soda just as well.
Do not mix products at all. Acid combined with a chlorine product gives off harsh fumes, soda and acid cancel each other out, and instead of cleaning you get foam and disappointment. One product per procedure is always enough.
Poor rinsing and aftertaste
And the most common mistake is poor rinsing. The bucket of water saved on rinsing is the usual reason for the aftertaste that remains after cleaning. As long as the water from the tap differs in any way in taste or smell from the water in the bottle, the procedure is not finished, however long it has already taken.
The don'ts in one list
- Don't use bleach, bathroom cleaners or any household chemicals containing chlorine
- Don't use scouring powders, metal scrubbers, scrapers or the rough side of a sponge
- Don't pour boiling water into the tank or expose it to sudden temperature changes
- Don't switch on heating with an empty tank — the element burns out within minutes
- Don't finish the procedure while you can still taste the cleaner in the glass
When to call a technician and how to keep the cooler cleaner
The question usually goes like this: how often should you clean a cooler if it stands in an office and twenty people use it. The answer has already been given, every one to two months, but the question has a follow-up — do you always have to do it yourself. The home procedure is enough in most cases, and yet there are situations you cannot handle on your own.
When you need a technician
- The smell has not gone after two full treatments in a row
- A bottom-loading cooler or one with a built-in filter: they have their own parts that come off only with tools
- The cooler has stood with water in it for several months, and there is visible film or sediment in the tank
- Water leaks from under the casing or collects in the drip tray by itself
- The cooler is rented: the rental agreement usually does not allow you to take it apart yourself
At a service centre the cooler is taken apart more thoroughly than is possible at home: the tank is removed, the hot water circuit is flushed of limescale and the parts you cannot reach from outside are treated. You can simply order sanitising there too, but for an ordinary home cooler it is a way to save an hour, not a necessary service.
Read more: Water cooler rental
Habits between treatments
Prevention is more reliable than any cleaning, if only because it costs nothing. A cooler that gets a quick wipe now and then needs almost no care between treatments, and the procedure itself goes faster.
- Wipe the seat under the bottle neck and the tap spouts at every bottle change
- Wash the drip tray once a week: slime appears there first
- Do not hold the bottle by the neck, and rinse the shoulders and cap before putting it on
- Do not keep an opened bottle for more than two weeks: even untouched water changes taste in that time
- After a few days without use, run off a glass from each tap
- Keep the cooler away from windows, stoves and radiators: heat and light speed up film growth
- Cover it with plastic sheeting during renovation or dusty cleaning
A date in the calendar
One more habit saves the most effort — giving the treatment a date. A cooler sends no signals and has no warning light, and you cannot see the film until it can be felt with a finger. A reminder in the calendar once a quarter settles the matter more reliably than an intention to wash it when you have some free time.